Friday, June 28, 2013

My books arrived!

I made some photo books with MDS for my mother-in-laws birthday.  I finished them just in time for the 25% off sale that ended on the 15th.  One of the nice things about digital is that I was able to print multiples very simply.  I made one for my mom and myself as well.  In the past I have started from scratch and designed each page on its own.  For this book I used a photobook template.  This was so quick and I really love how it turned out.  I wont bore you with every page, but here are a few...
 
 
I made a few pages highlighting each of the children, and then a bunch highlighting some family outings.  The template is called "Family Fun" and the name fits perfectly!! Love it!
Thanks for stopping by!!

Thursday, June 27, 2013

Comic Notebook

I love the journals that you can print from Stampin' Up!  I have printed quite a few of these.  They are fun for baby gifts for new moms, journals for kids, and nice for me to keep track of all the things the kids are up to and the funny things they say.  A while back I made a journal for my oldest son David.  I scanned one of his comic drawings and used it on the cover.  I love to see him using it and he often gives the book to me to read some of his stories.  My younger son Zachary has really come a long way with his reading this year, and he recently asked for a book of his own.  I love this because it really helps to reinforce the reading and writing that he learned during the school year.  He wanted to design the cover with a computer drawing he made of a "creeper" from the game "minecraft."   I wasn't too thrilled with this as its a very basic and odd picture and he has some much cuter stuff, but hey, its his book right.  The book arrived yesterday and he jumped up and down with happiness!  He wants to make comics just like his brother! He started writing in it right away.


He even brought it with on our outing today and used it while waiting for his food to arrive at dinner.
 
I just love all the personalized gifts you can make with My Digital Studio.  I can't wait to see what my son has filled his book with in a few weeks!!
See other journals I have made here.

Wednesday, June 26, 2013

MDS.Net arrow challenge

As many of you know, I love to participate in challenges.  I strongly feel this is the way to get to know the mds software and learn all that it can do.  It is also the way to get inspired to create a page.  This week the challenge at MDS.net is ARROWS.    This page highlights my son Zachary learning to ride without his training wheels a few weeks ago.  He was so proud of himself, and so happy!  I had been trying to get him to do it for a while now, and I told him that once he did it he would love it, so I'm glad that it all turned out.  He rides just about every day now!  YEA!

I used embellishments and paper from the "A split second" download.  The font is called "fish fingers". 
Thanks for stopping by today!!

Monday, June 24, 2013

MDS Monday challenge #20

It's MDS Monday Challenge time again!  Rochelle has a card sketch for us this week.   I like the clean and simple look of this sketch, it was super quick and easy to make a card with it.  I chose papers from "Delight in the Day" and the stamp is from "Punch Bunch."  I colored the stamp using the coloring tool, I love to do that!


I also made a page with the same sketch...
 
Hop on over to the MDS Monday site to see what the other designers have done with the sketch!


Monday, June 17, 2013

MDS Monday challenge #19!


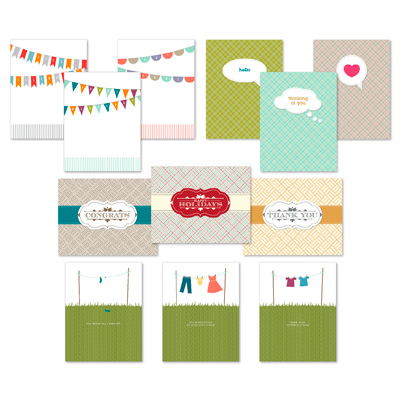
            It's Monday again!  This time Heidi's got a scrapbook sketch for us to try.  This is a great sketch for when you just have one or two photo's of an event.  This is a photo of my daughter's last day of pre-school.  They had a Beach themed day, so all the girls had bright clothes and I thought the rainbow of colors in the Sunshine and Sprinkles kit was perfect for this page.


Here is the sketch!  I hope you give it a try!  and hop on over to the MDS Monday site and see what the other ladies did with the sketch.
           

Friday, June 14, 2013

Sale Ends Saturday!

Sale on Digital print products and select digital content ends Saturday!  Get those pages finished and printed!  I printed 20 pages and 6 swatchbooks!  I love an extra discount! I'm working on one more book, hope I can squeeze it in by then! 

Wednesday, June 12, 2013

Digital Pocket Pages

If you are like me, you loved those divided pages Stampin' Up! carried in the last catalog.   I also like the look of some of the "Project Life" type of pages.  But, I also like to use what I have, and I like to keep things simple, and I love Stampin' Up! and all things MDS, so I thought I would make a digital page that had the feel of a pocket page.    What do you think?  The only thing I thought made it not look like pockets was the lack of stitching, so I added some of that, but I'm not sure which is better.  What do you think?


This page was actually pretty easy.  I started with a pre made photo template page.  Did you know you have those in your software?  Check the side bar, it look like this...


There are lots of templates to choose from, just click and drag the one you want to your page.  You can fill the photo boxes with pictures or papers.  I used the Anchors Away June Kit download for my page. 


Anchors Away June Kit #134683 $9.95
 
 
Thanks for stopping by today!

Monday, June 10, 2013

MDS Monday Sketch 18

It's MDS Monday time again! Do you like that we switched to every Monday instead of every other?  The more challenges the better right? And, you still get two weeks to complete the challenge!  This week is a card sketch with a technique challenge added.  The Technique is Faux Embossing. 
Here is the sketch from Tara ...


Faux embossing is pretty simple and you can do it a few ways.  You can add a stamp, as I did on my card, or use punches.  Here is what I did.
I added a background color to my page.


Next I looked for a patterned stamp.  You can use the search tool to browse your selection.  Use search words like "overlay" or "stripe" or "Dots"  things like that.  I did a search for stripes.
Choose the stamp you like then hit apply.  You may have to enlarge or shrink the stamp to fit your space.
Next you need to change the color of your stamp to the same color as your background.  Your stamp will seem to disappear.  Add a drop shadow to your stamp and you will see the shadow on your card.  This mimics the look of dry embossing.  It adds a nice bit of depth to the digital card base.


You can change the drop shadow to white for an interesting look.  Play around with the opacity and blur until you get the intensity of shadow you are looking for.


Check the MDS Monday page to see what the other designers came up with. 
Thanks for stopping by today! I hope you give our sketch and technique challenge a try.
 

Friday, June 7, 2013

Family Spotlight

I just loved the Family Spotlight Download.  It  has so many cute things for a family scrapbook or recipe book or reunion.  My favorite though was this cute tree.  I knew I had to make a project with it right away.  I will print this out and put it in a frame.  Cute right?  I added the date my husband and I got married to the top heart, then our names to some leaves.  I wanted to make the kids names a bit larger, so I cropped a leaf from the tree and enlarged it, then just added them to the bottom.  So simple, it took me just minutes, but it is super cute. I am sure I will use this download again and again. 


item # 134508 Family Spotlight Ensemble
makes recipe book, cards, printables and more
or
item #134596 Family Spotlight Photobook
comes with 26 page photobook template as well as papers, stamps and more.


Wednesday, June 5, 2013

More Notepads

I gave some notepads to teachers a while back (here they are) and one of the teachers asked me how they were made.  Once I told  her how simple they were, and how I could just change the names with a simple text box change without having to recreate the whole thing, she asked if I would make some for her son's teachers and aides.  Of course I said sure.
I found that the notepads at Vista Print are about the same size ratio as the Journals from Stampin' Up! (not the same size, just similar in the height to width ratio).  They are normally $8.79 but I had a coupon for 50% off and free shipping!  To see how I made the tag, hope on over to my "Beth's Paper Cuts" blog.  


         To start creating the notepads I opened a Journal template, and selected the "Create your Own" option.       
Select "Journal"


Select "Create Your Own"


Now you are ready to design.  You will see a front and back, just ignore the back.
A few other things I want to point out are the crop tool and the search function.  I used the "Search" function in the stamps to find a flower stem that would work nicely with button flowers.  I simply typed "Flower" into the search box and all the flower stamps came up.
The search function is great, I use it all the time.  It's hard to remember all the stamps or embellishments that I have.  You could also try "stem" or "petal".    This will save you lots of time from looking in all your stamps.
I also used the crop embellishments function.  I wanted to put some twine in the button holes, cant stand and empty button for some reason.  The bakers twine bows are super long though.  I selected a bow, then clicked the crop button, and highlighted just the area I wanted.
Now I had nice shorter bows. 
In case you are wondering about that grass at the bottom, it is a paper filled punch.  The grass punch is from a download called Celebrate Any Say Greeting Cards.  This download may look simple, but it has the fun grass punch, speech bubbles and cute pennants.  It gets a lot of use from me.  The grass is also great as flames, see...


item # 127757  $9.95

Thanks for stopping by today!  I hope I've inspired you to make some thing personalized!  Give it a try!


Monday, June 3, 2013

MDS Monday sketch 17

It's Monday again, and that means MDS Monday has a new challenge.  This Monday Joan has the challenge and she has created a fun sketch as well as a technique challenge.  The technique is to add your text to a shape.  Did you know you can do that? On my page I added my text box to my chevron punch.  You can attach your text to any punch shape.  Here is a great video tutorial for you from Stampin' Up!  Did you know that there are a ton of video's for you to watch at MyDigitalStudio.net?  Watching the videos and trying out the techniques is a great way to get to know all that MDS can do. 


Here is the sketch.
Now its your turn to give it a try!