
 Did you notice some of the new MDS2 features? On the Butterfly card I used the new free form line to add text in a wavy line to look like a trail from the butterfly. I also used the coloring tool to add multiple colors on my butterfly. Super Fun! I forgot to get rid of my "bleed area" when doing a screen capture image, so ignore the shaded grey area on the side of the card, its not there on the actual page :)
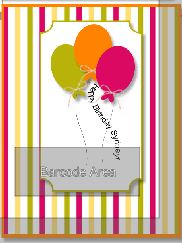
One of the Balloons on this page also has a free form text line as the string.
The boat card uses the stamp coloring tool like the butterfly card.
 I will be teaching the stamp coloring and free form text line at my upcoming MDS2 class. If your in the area, contact me for details. If you are not in the area, no worries, I can find some video links for you to view if you would like to learn more.
 .jpg)
.jpg)
.jpg)
This card is all flat except the brads. Doesnt it look layered?
.jpg) Here is the wavy text line up close.
Here is the wavy text line up close.
No comments:
Post a Comment